Motion Detection on the DVR can be used to trigger recording, send images to an FTP Server or display a camera full screen. The detection area and sensitivity can be set to suit the image.
An area can be set for each camera which the recorder constantly monitors, when there is enough changes in the pixels between frames then Motion is detected. Each camera and be configured to handle the alarm differently.
1. In the menu of the Recorder, go to Video > Motion
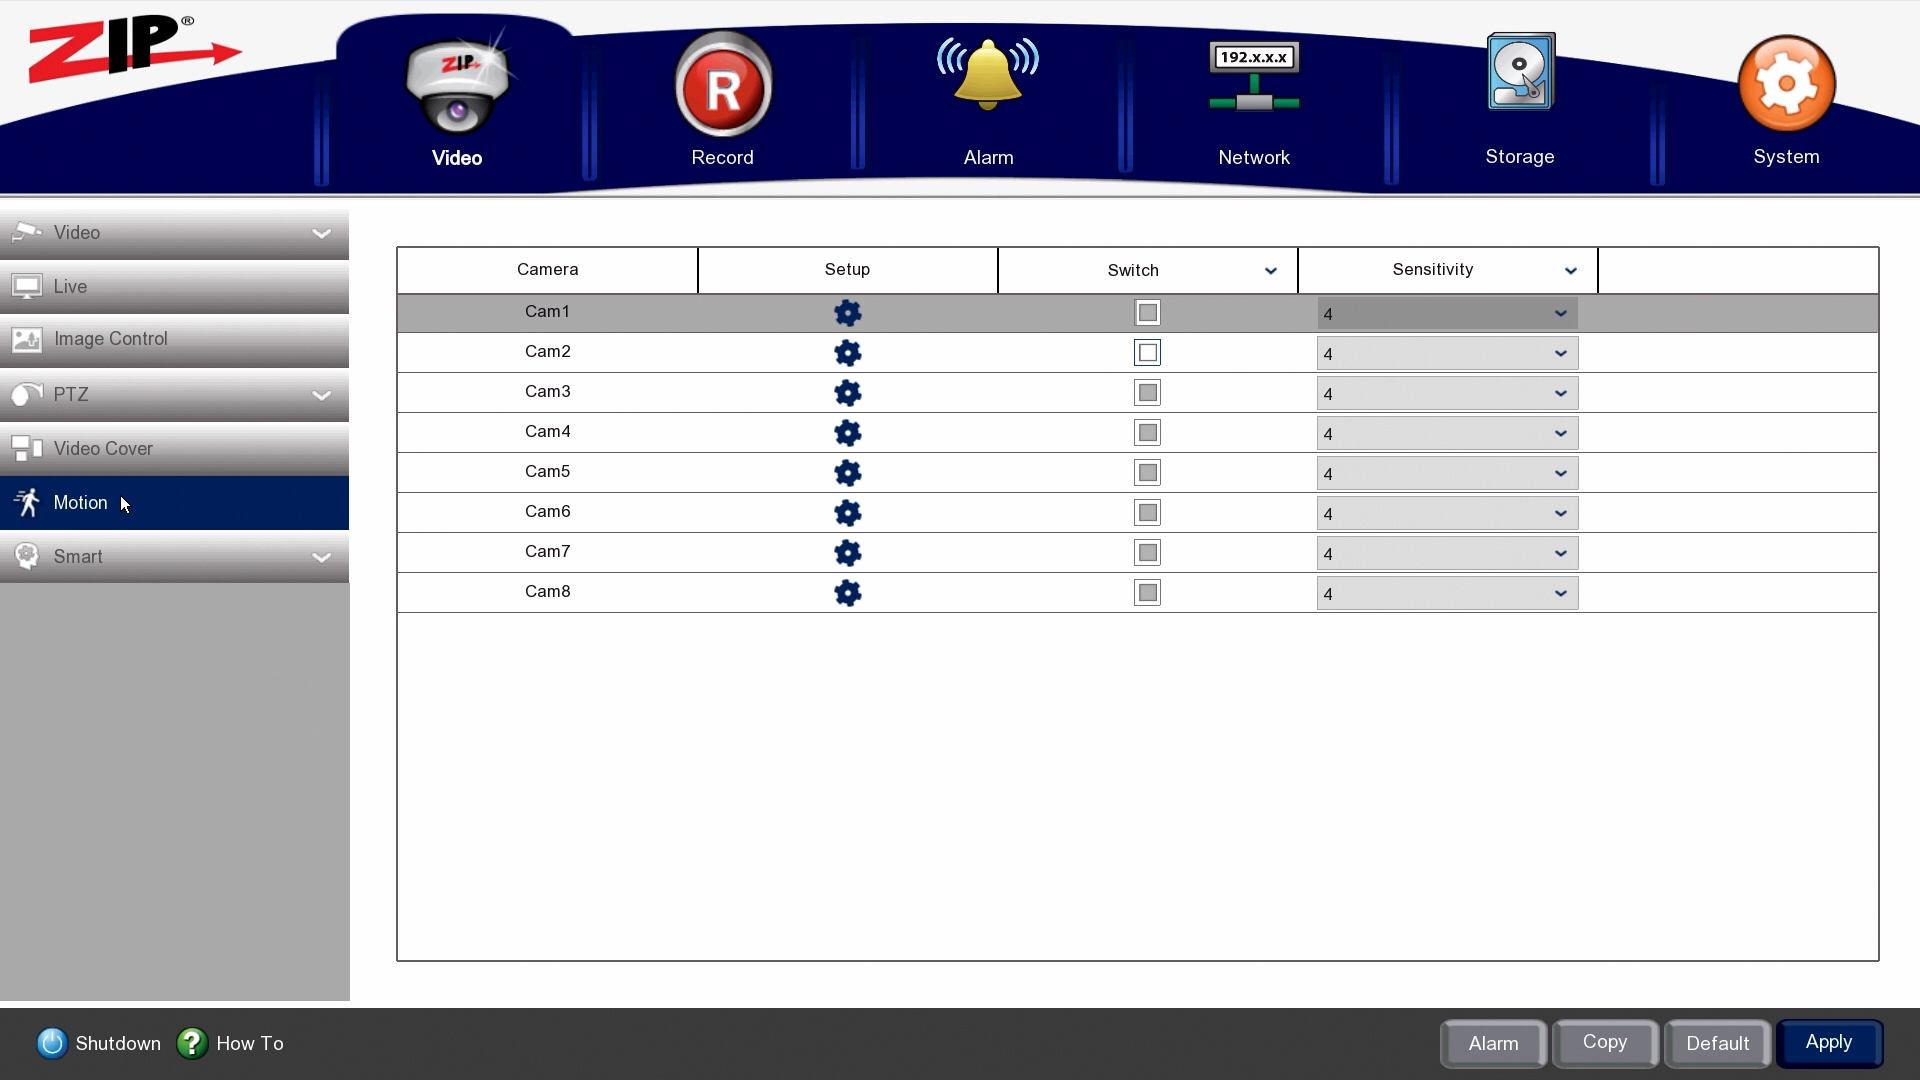
2. To set the Motion Detection area click on Setup
![]()
3. Drag and draw the on the red grid to remove and add sections from the armed area.
- Red highlighted area > the Motion will be armed
- No red highlighted area > the Motion is disarmed
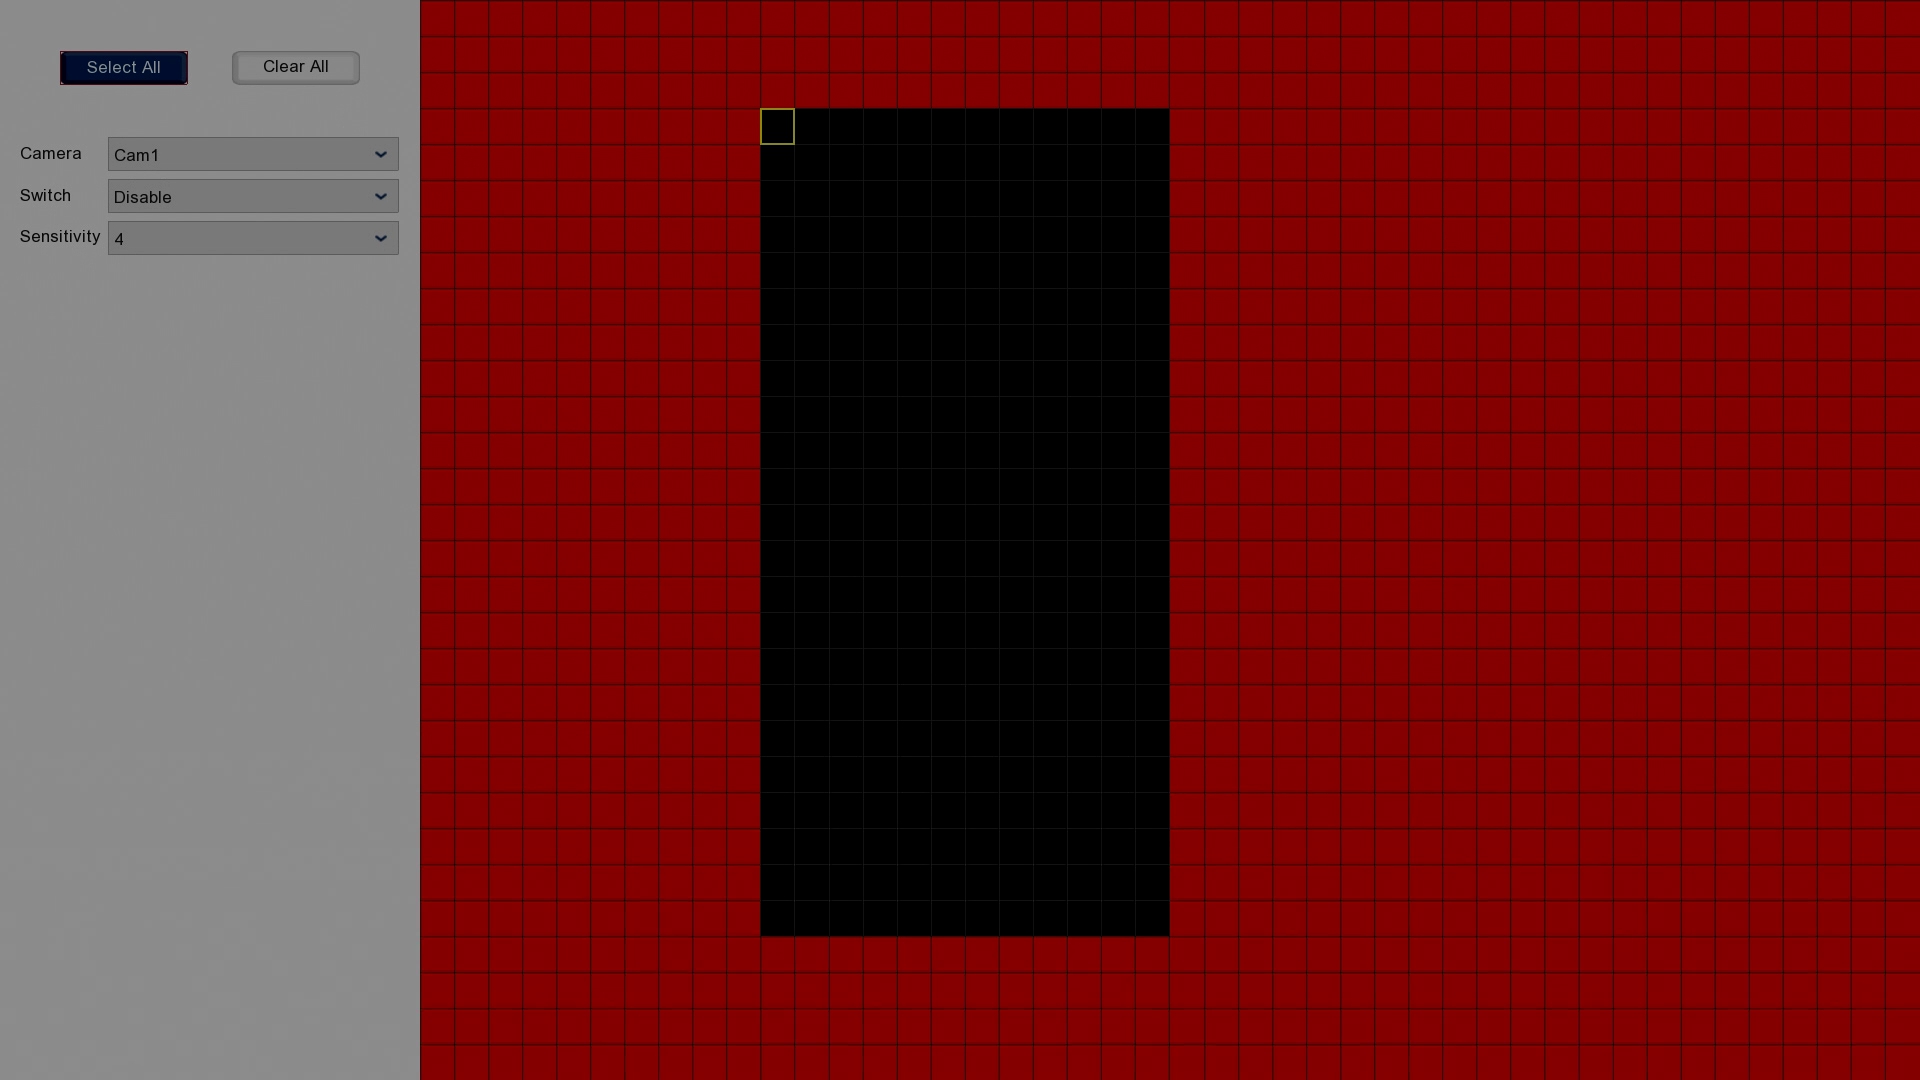
Right-click to exit the area setup.
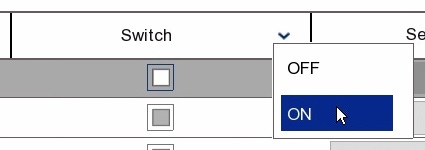
4. Check the tick-box Switch ![]() to enable Motion Detection for the camera.
to enable Motion Detection for the camera.
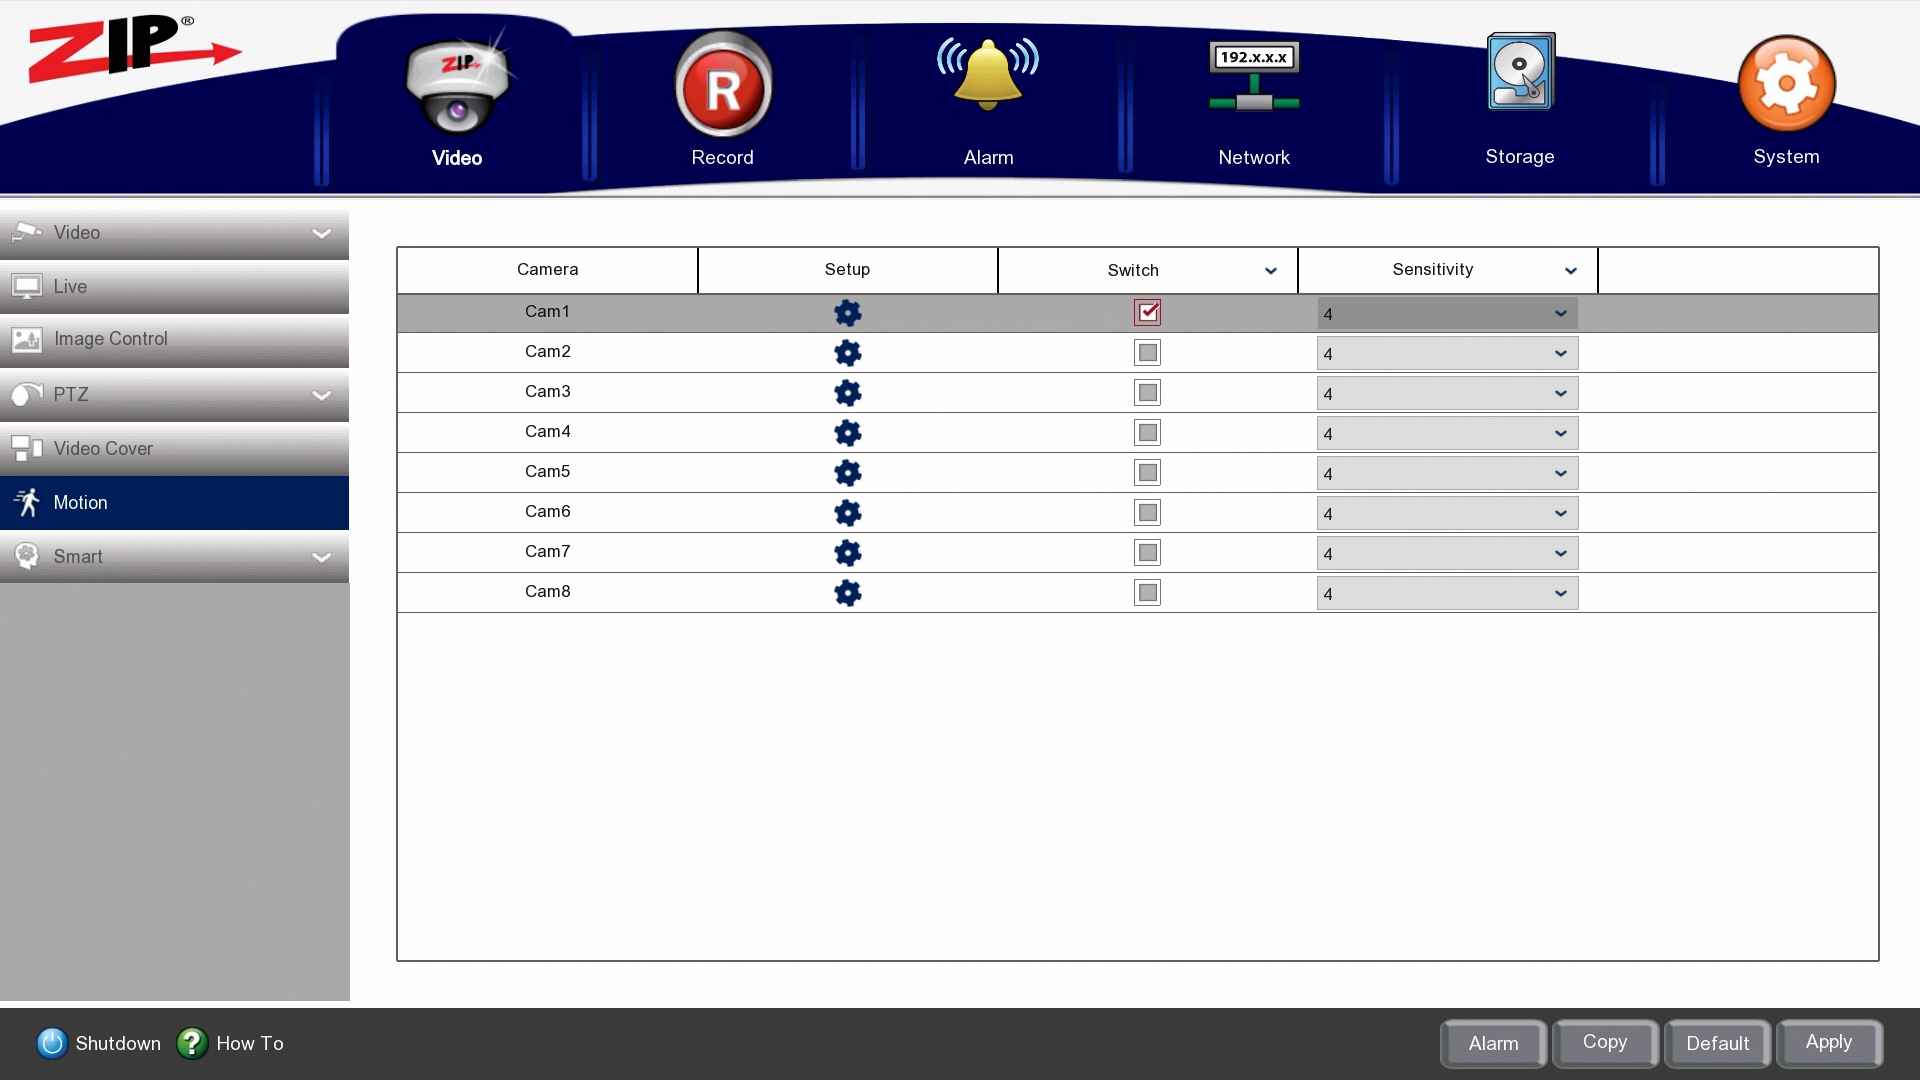
TIP – To enable all cameras for Motion Detection select the top Switch option, then click ON.
5. Sensitivity can be adjusted depending on the required level of change of pixels in each frame.
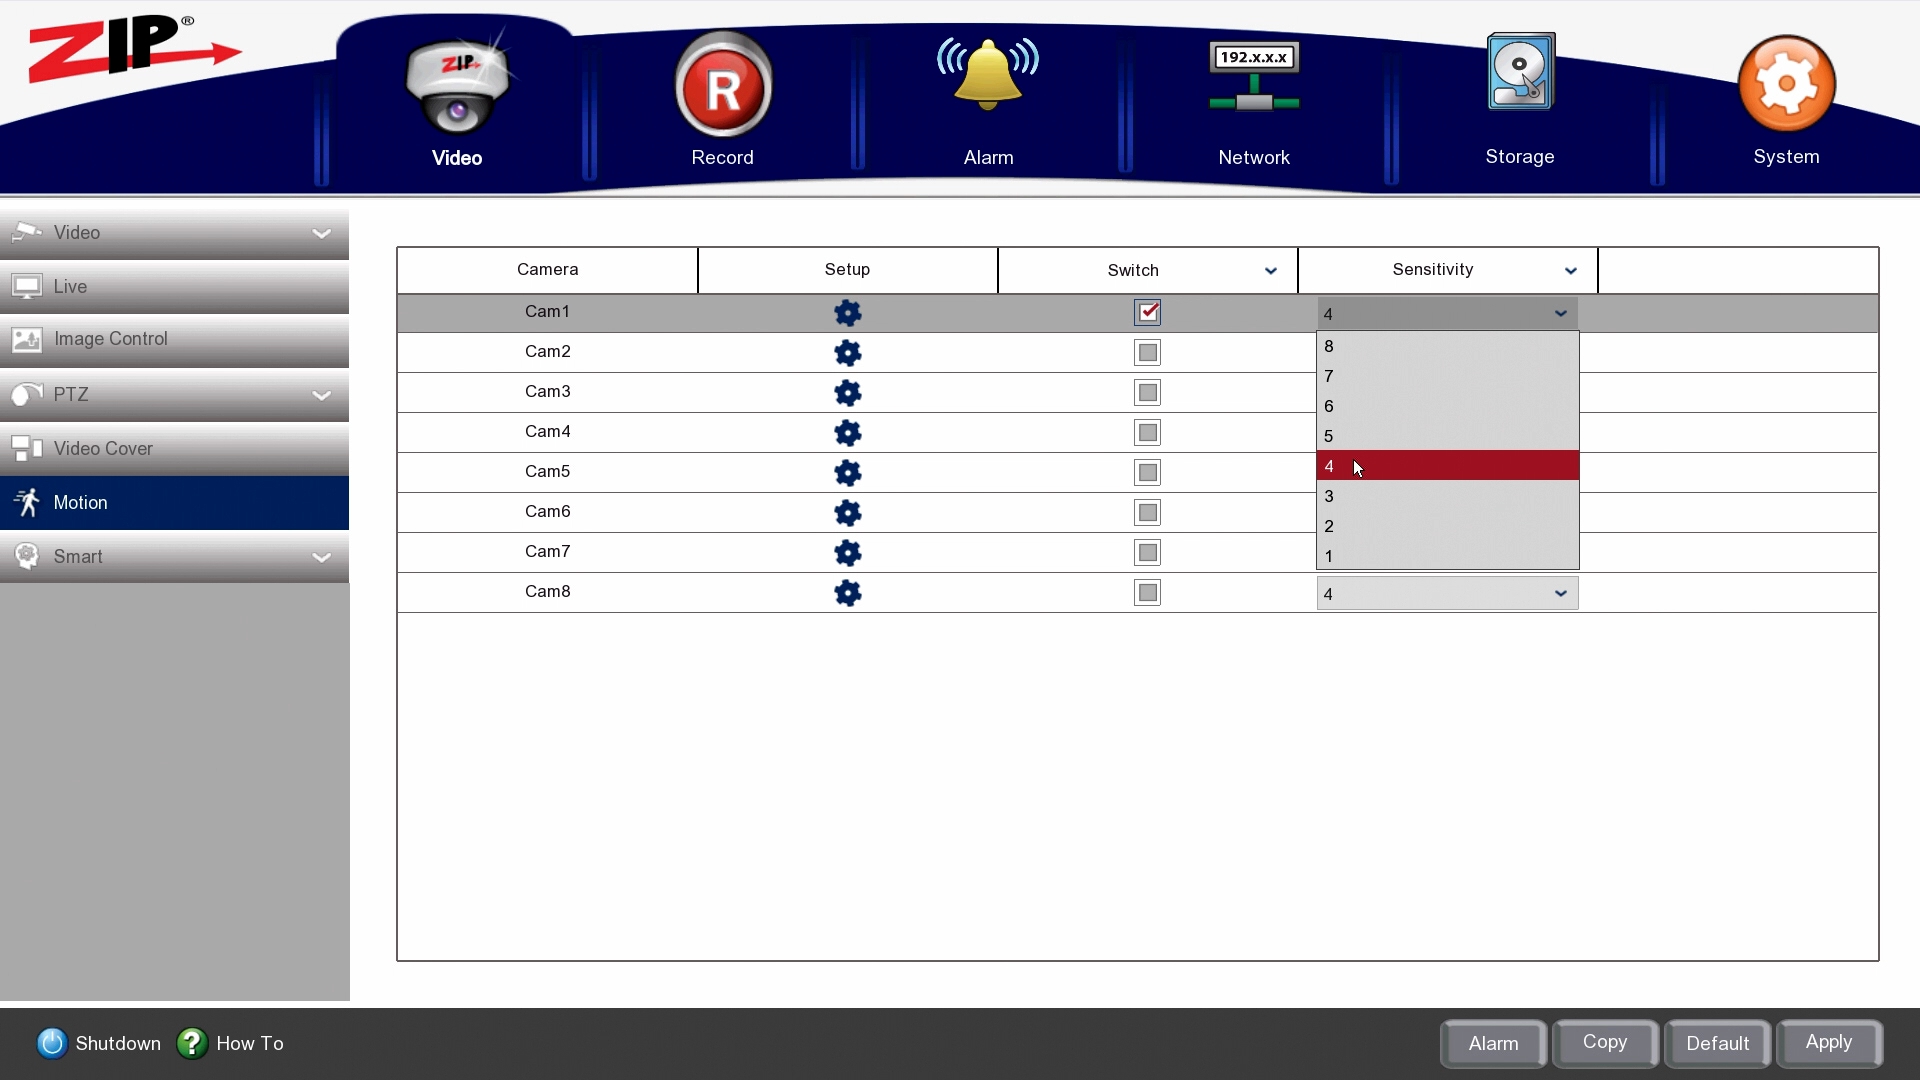
Then click Apply.
TIP – Once Motion has been setup, have someone walk in front of the camera to check if the sensitivity is appropriate and if motion is triggered. If the subject is far away from the camera then the sensitivity may need to be higher.
6. Click on Alarm to set how the recorder handles the Motion Detection Event.
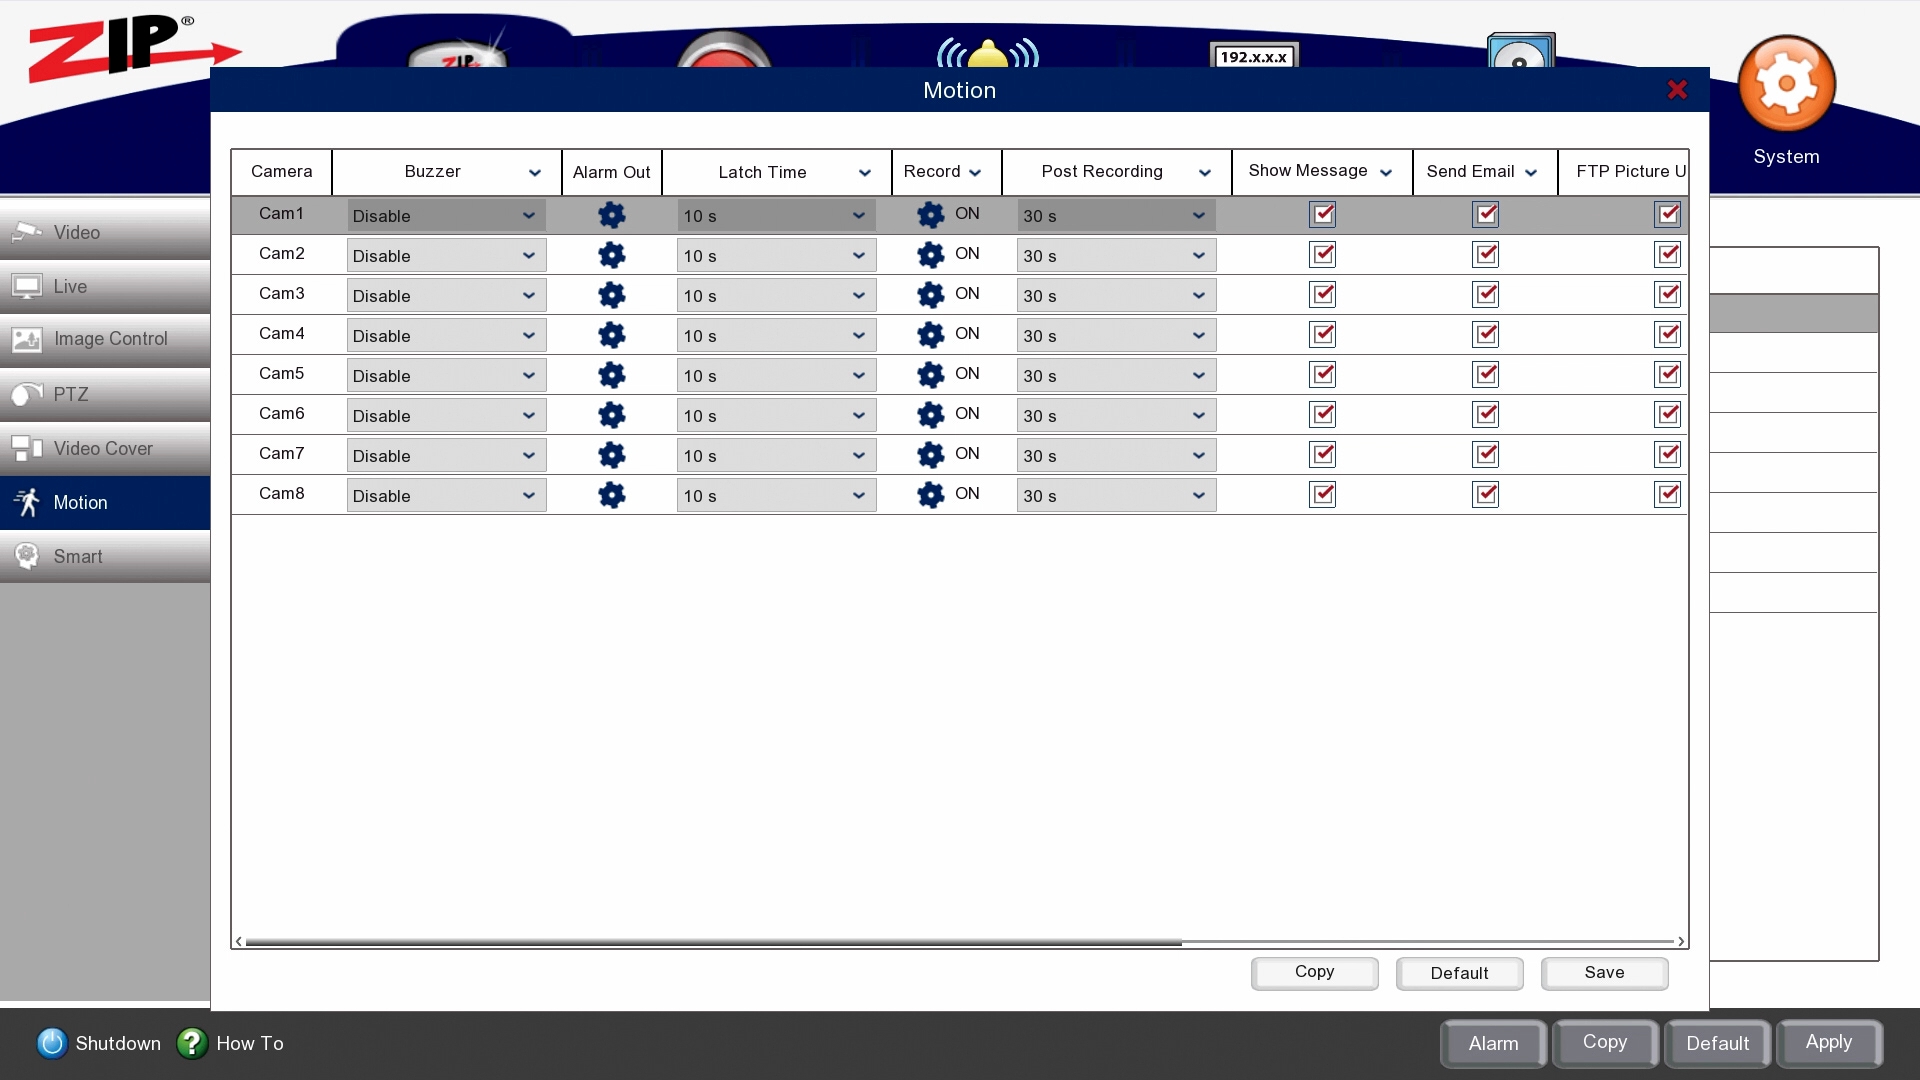
Buzzer: Trigger an audible beep when the Motion is triggered.
Alarm Out: Trigger an alarm output when the Motion is triggered.
Latch Time: Set how long the alarm output switch is triggered.
Record: Select the channels which you want the Motion Detection event to trigger recording.
Post Recording: Set how long the recording is after the Motion Detection event.
Show Message: Set a visual display on the live view on the DVR when Motion is triggered.
Send Email: Send an email notification to the configured Email address via SMTP. See the manual for SMTP setup using the link below.
FTP Picture Upload: Send a picture to the configured FTP server. See the manual for FTP setup using the link below.
Picture to Cloud: Send a picture to the configured Cloud server. See the manual for Cloud setup using the link below.
Video to Cloud: Send a video to the configured Cloud server. See the manual for Cloud setup using the link below.
Full Screen: Set the triggered channel to display full screen when Motion is triggered.
See our DVR Manual online:-
www.zipdvr.com/howto/manual.html
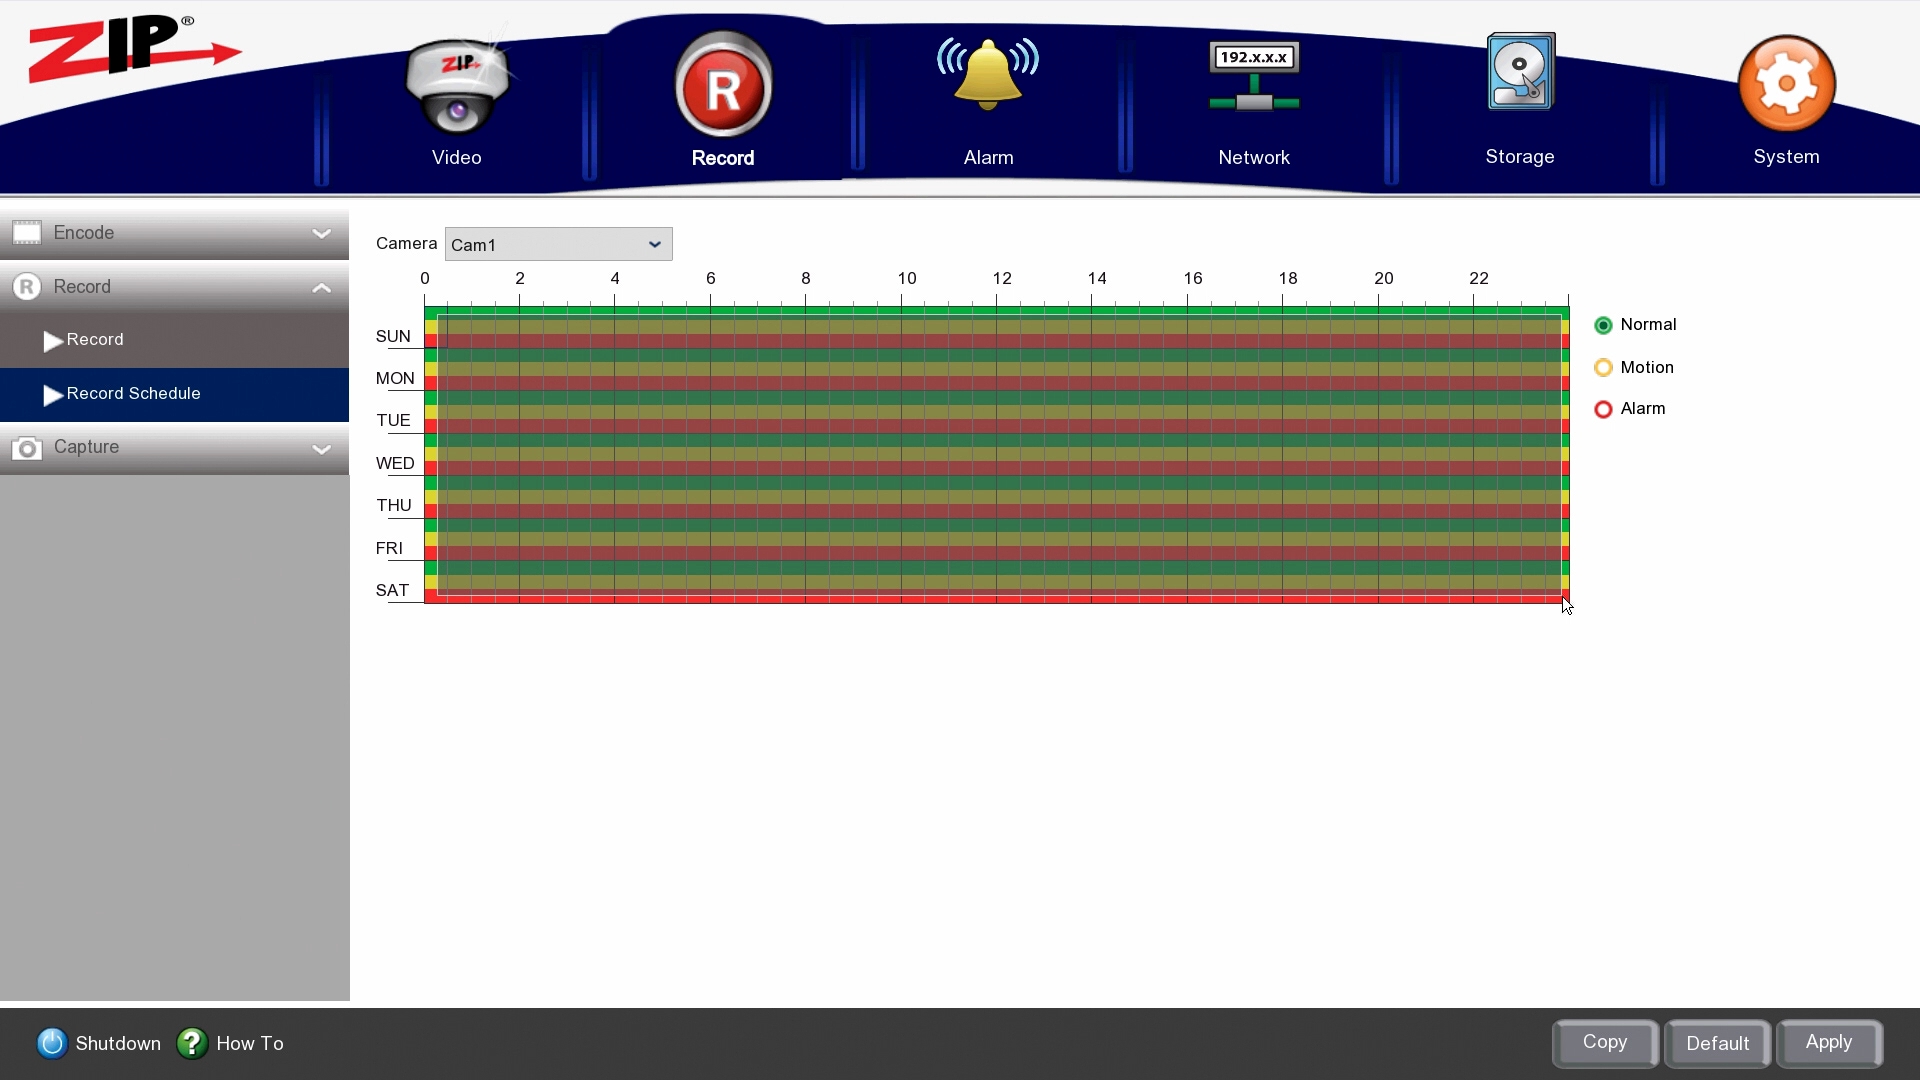
7. To set the schedule for the cameras, go to Record > Record > Record Schedule
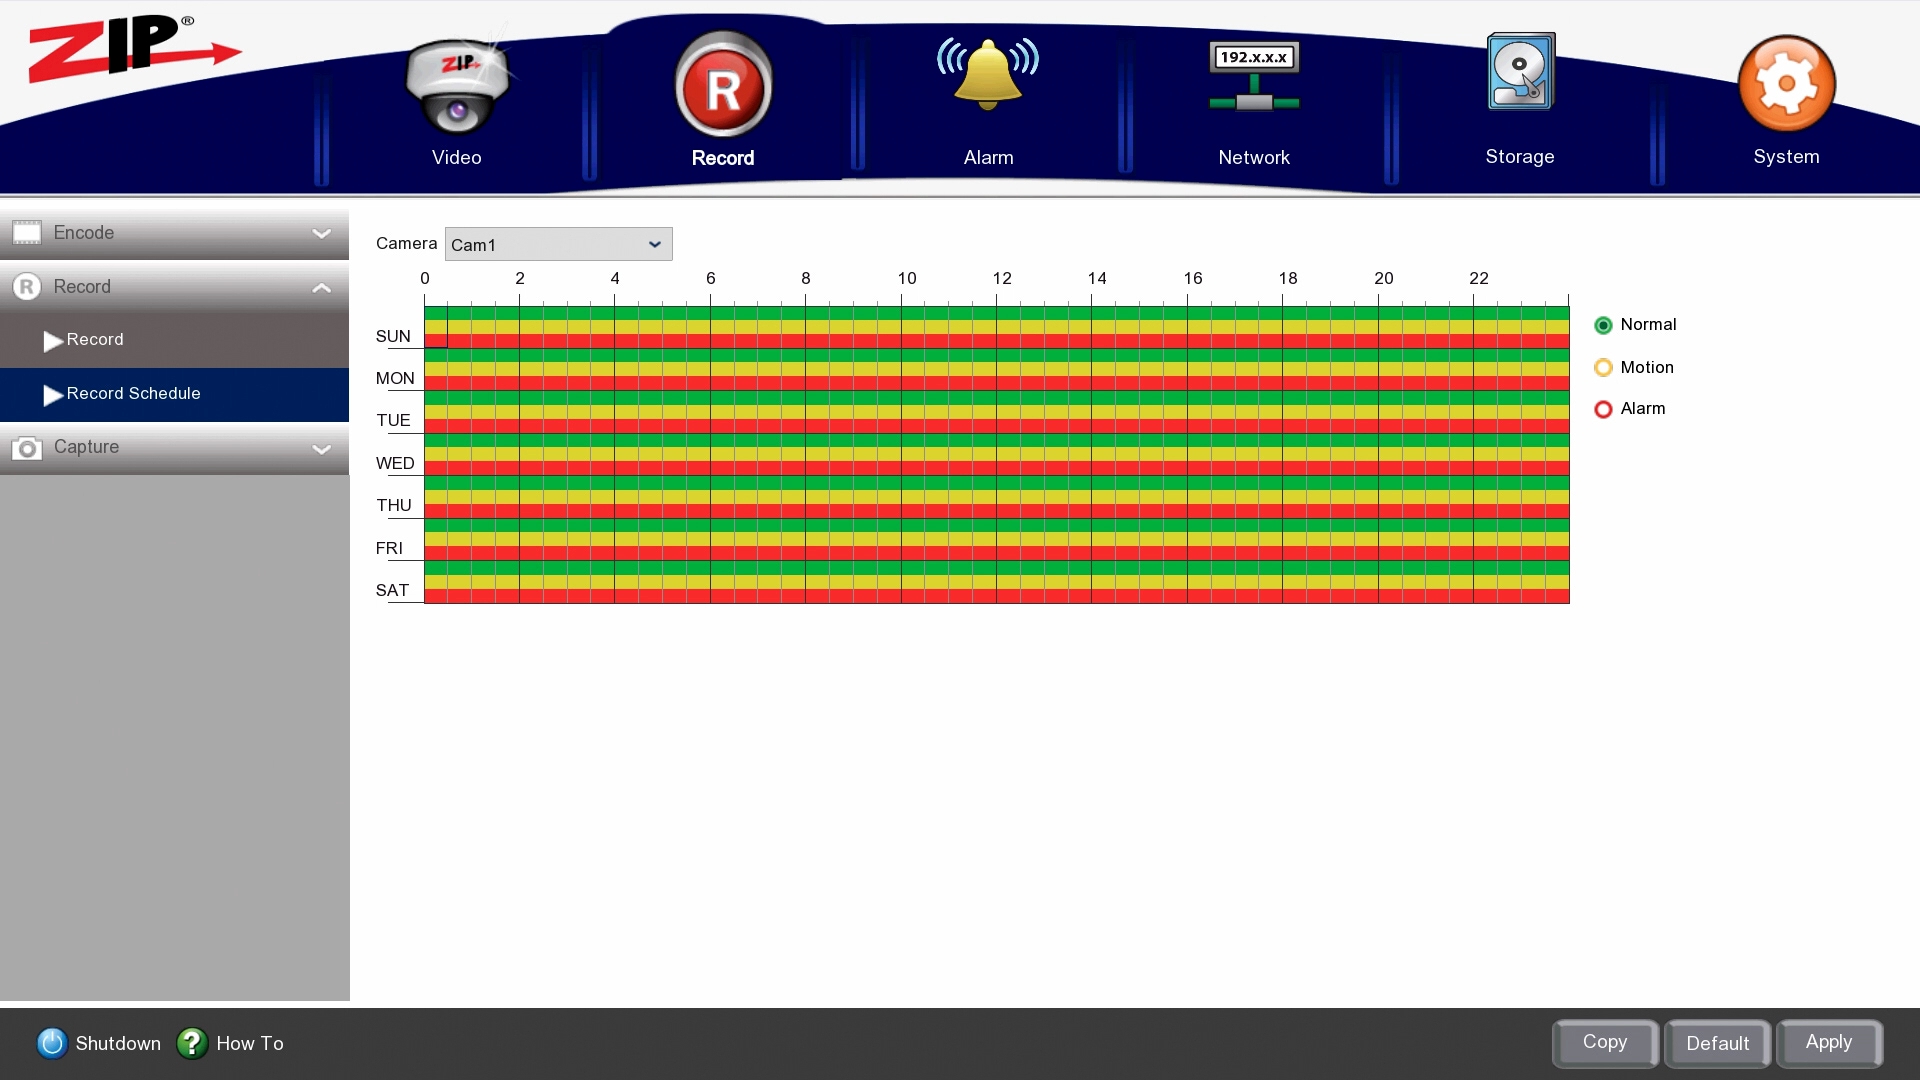
As default the cameras are set to record on Normal & Motion & Alarm, this means that the cameras record all-day continuous, and any motion or alarm triggers will also show in playback & event searches.
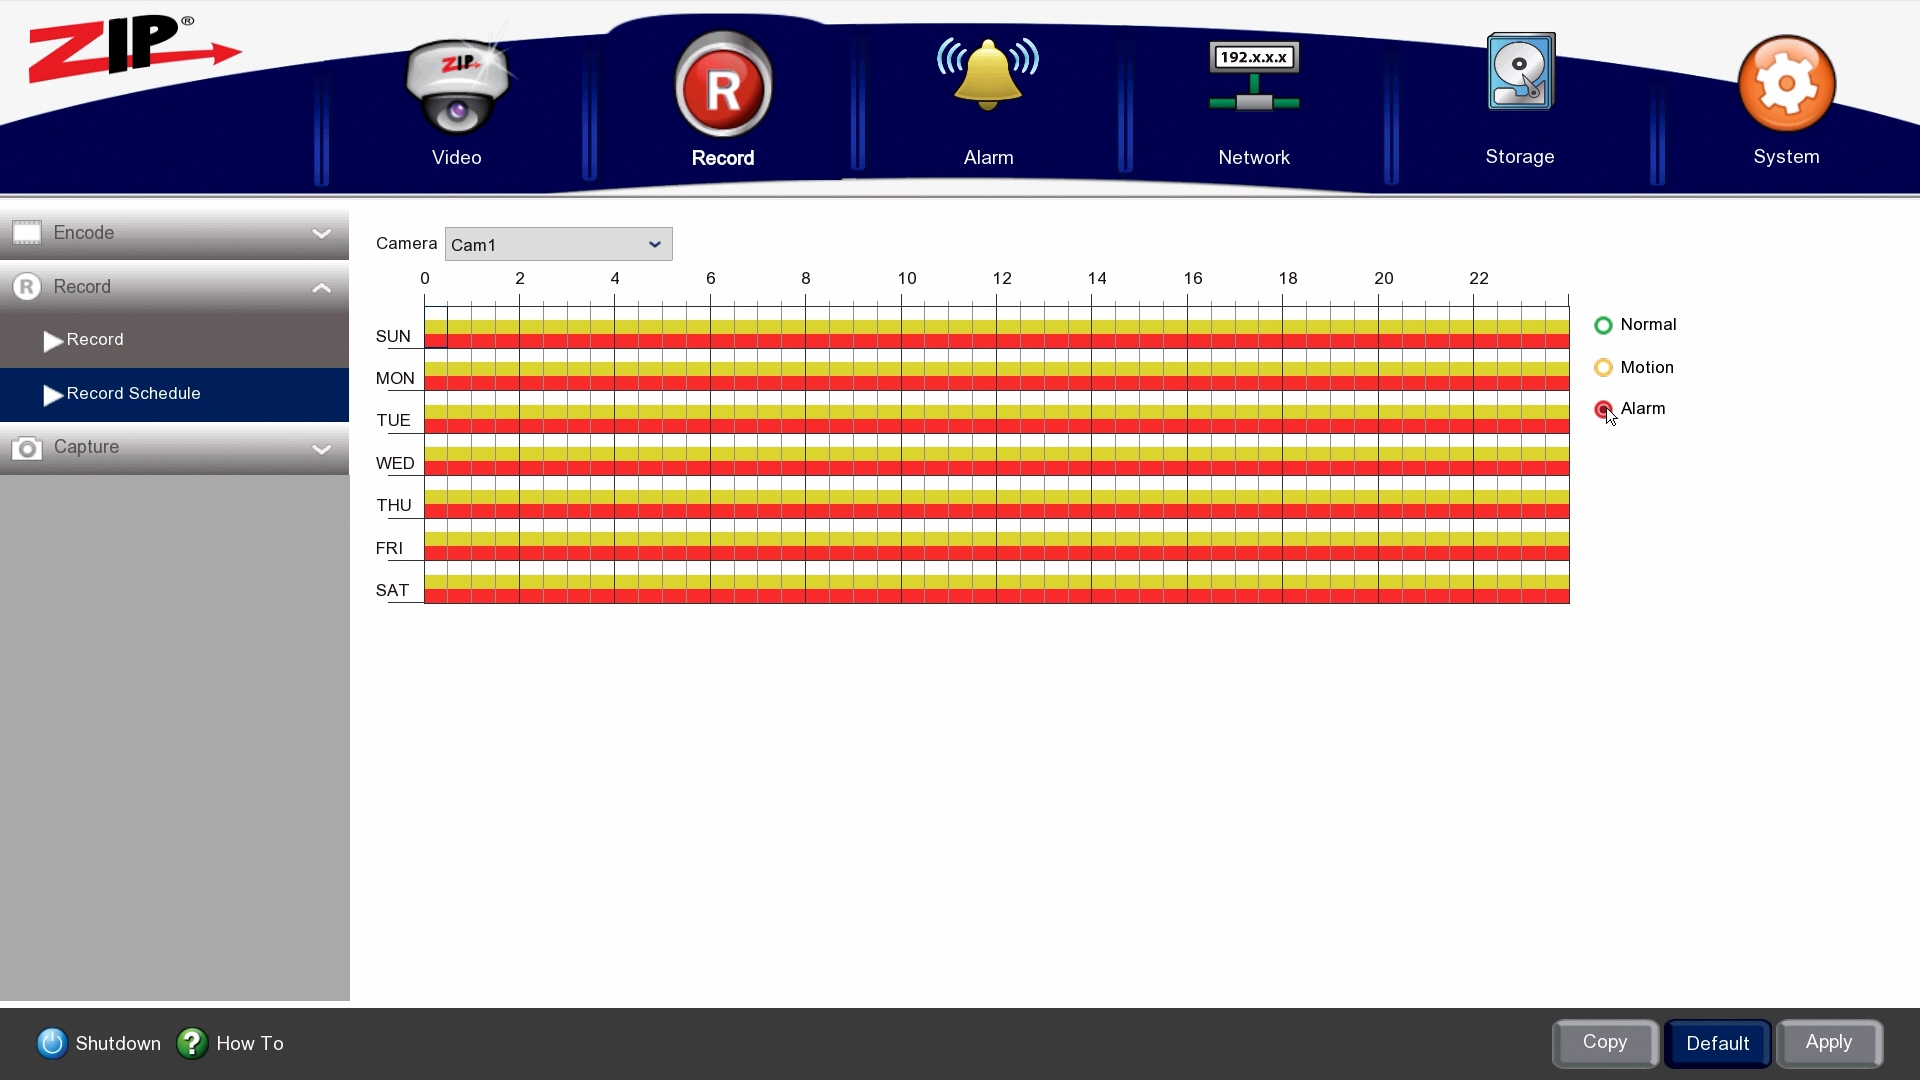
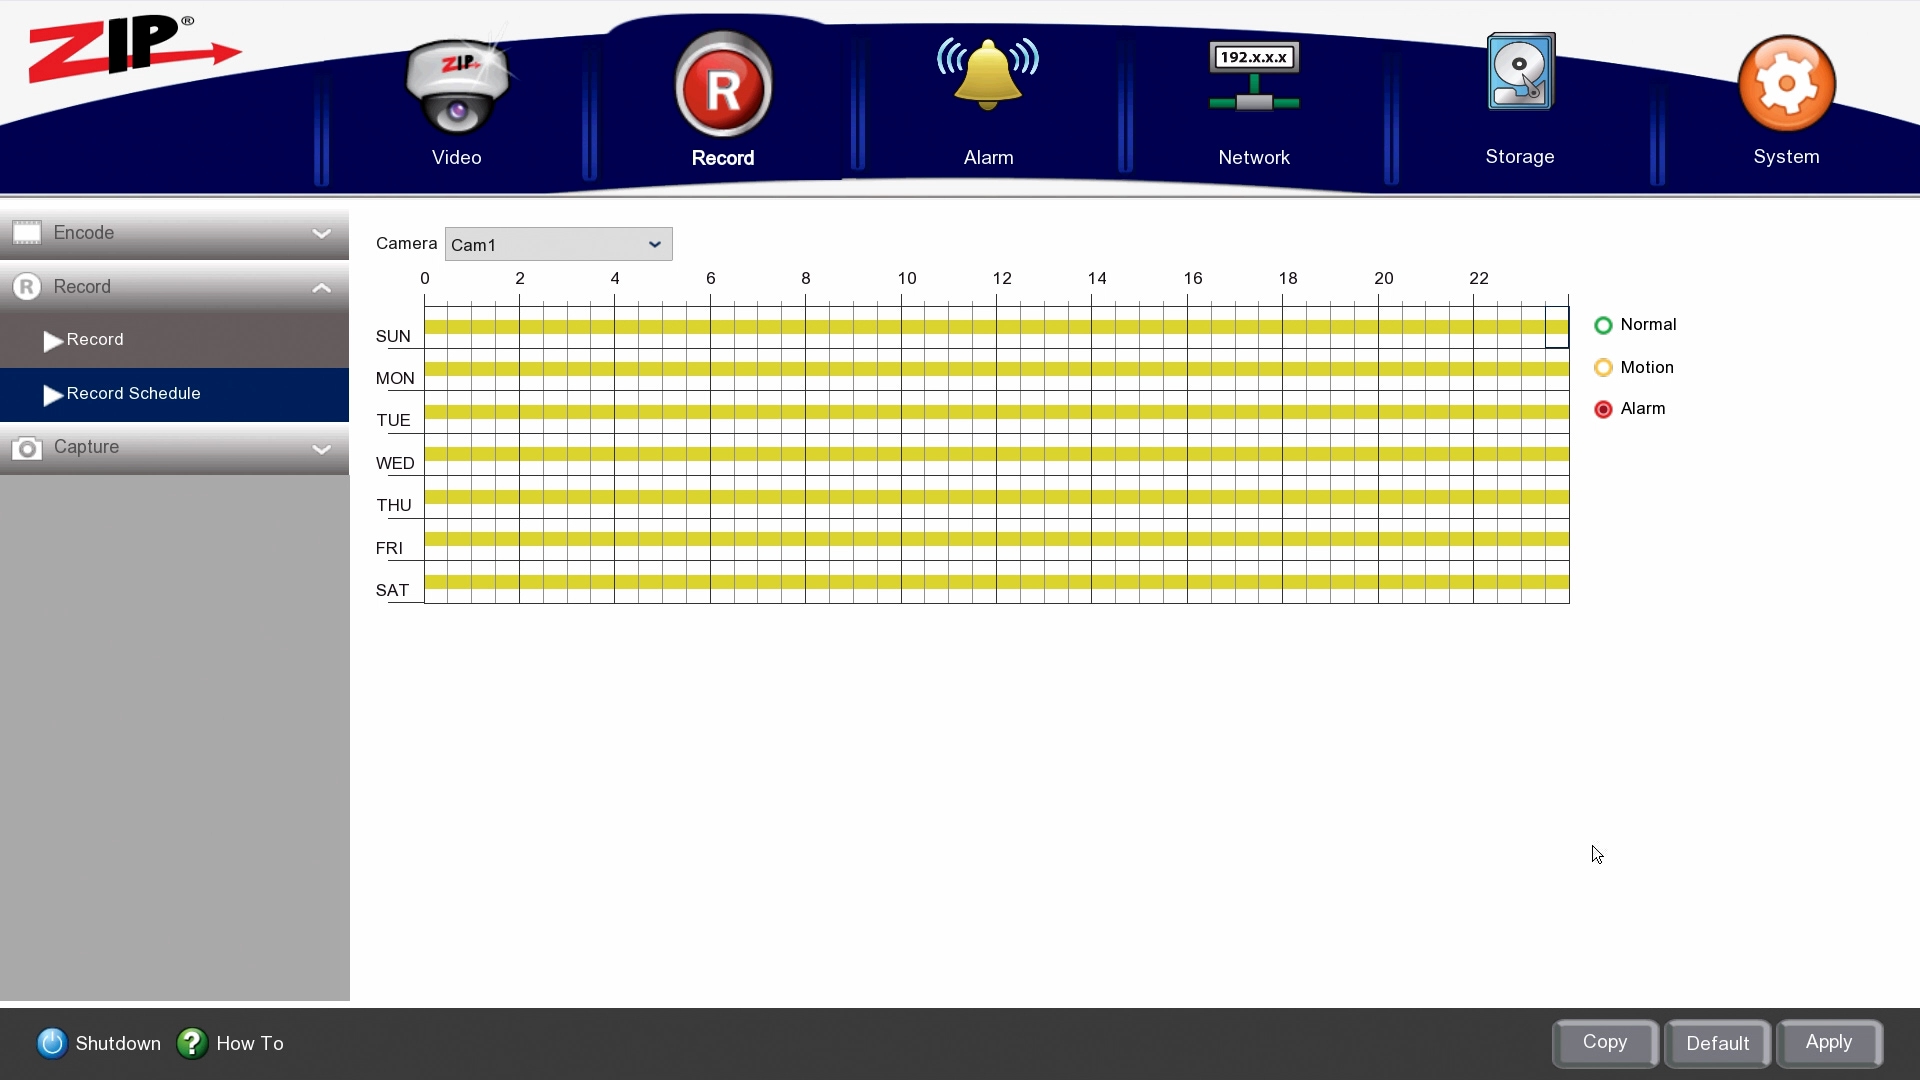
8. To customise the schedule to ONLY record when there is Motion Detection then, Normal & Alarm triggers need removing, select the key on the right to select the record type to alter.
You can repeat steps to set schedules for other channels. If the settings can also be used for other channels, click Copy and then choose the channel to which you want to copy.
Click Apply to save the settings.