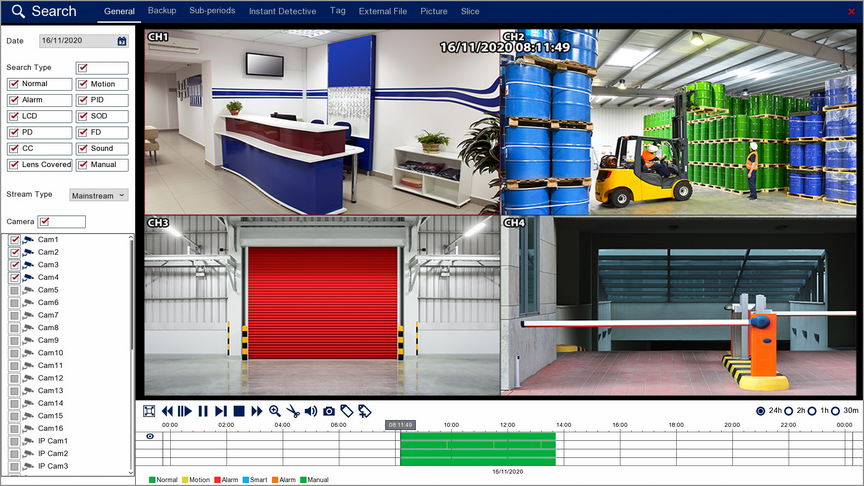
The Playback screen is your hub for reviewing, interrogating and backing up footage.
The Playback screen can be accessed in 2 ways. The first method is to press the PLAY/PAUSE button on the front panel of the recorder. This will take you to the Playback screen with no search results. By default it will open on today's date but with no cameras selected and no footage playing.
Alternatively you can select Playback from the Live View menu. This will take you to the Playback screen with all live cameras selected. Again by default it will start from today's date and it will automatically start playing the earliest recorded footage.

You have these options inside the Playback screen:
•General - for traditional footage playback
•Backup - for backing up recorded footage
•Sub-periods - Plays consecutive time periods from one camera at the same time in a split screen display
•Instant Detective - Lets you retrospectively interrogate footage.
•Tag - Allows you to find footage using custom tags
•External File - Playback footage from a storage device
•Picture - Lets you search for and view captured snapshots.
•Slice - A great tool for finding an event by narrowing down using thumbnail snapshots.
When you enter the Playback screen it will open on the General playback tab. This is the traditional playback screen you will be used to seeing if you have used CCTV recorders before. You can use the panel on the left hand side of the screen to search for footage by date, type and camera as explained below.

Playback Toolbar
For more information on using the playback controls see the Playback Toolbar Explained section.
Date
when you open the Playback screen it will automatically start on the current day. To view footage from a different day click the Calender icon to display the calender screen as shown below.

You can change the month and year using the blue arrows then select a date by clicking on it. An orange line underneath a date indicates that footage was captured on that day.
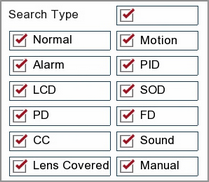
Search Type
Choosing the Search Type allows you to filter which footage is replayed based on what triggered the recording in the first place. For example, if you only select Alarm you will only see footage which was recorded because of an alarm trigger. By default all search types are selected. You can select any combination of search types or you can tick and untick the box next to Search Type to select or deselect all search types.

Normal: Shows all footage recorded from constant recording or normal Scheduled Recordings.
Motion: Only shows footage which was captured from Motion Detection.
Alarm: Only shows footage which was captured as the result of an Alarm Trigger.
PID: Only shows footage which was captured as the result of a PID (Perimeter Intrusion Detection) trigger.
LCD: Only shows footage which was captured as the result of a LCD (Line Crossing Detection) trigger.
SOD: Only shows footage which was captured as the result of a SOD (Stationary Object Detection) trigger.
PD: Only shows footage which was captured as the result of a PD (Pedestrian Detection) trigger.
FD: Only shows footage which was captured as the result of a FD (Face Detection) trigger.
CC: Only shows footage which was captured as the result of a CC (Cross Counting) trigger.
Sound: Only shows footage which was captured as the result of a Sound Detection trigger.
Manual: Only shows footage which was captured manually by pressing or clicking record.
Stream Type
The Stream Type drop down list allows you to filter between Mainstream and Substream recordings.
![]()
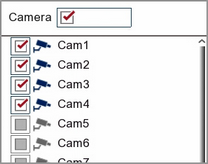
Camera Selection
By ticking and unticking the check boxes next to the cameras you can set which cameras are displayed during playback. Cameras which didn't record footage on the selected date will be greyed out and unavailable for selection. You can select any combination of cameras or you can tick and untick the box next to Cameras to select or deselect all cameras.
